

How To Install Plug In Ableton
How To Install VST Plugins In Ableton Live
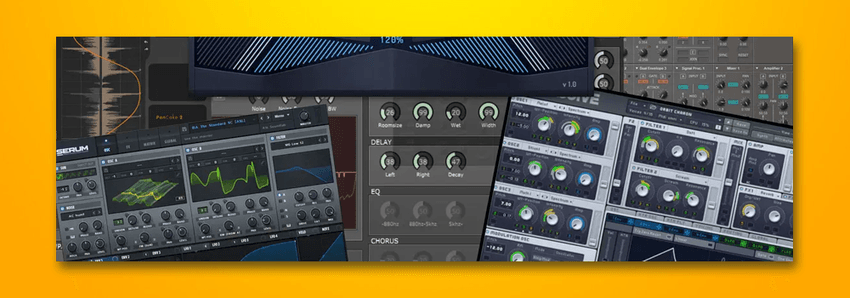
Plugins are used to broaden sound libraries, edit audio in unique ways and expand what is possible in music production. Enhance your Ableton experience and achieve any sound imaginable with an endless and accessible catalogue of downloadable plugins.
Hi, I'm Ben from Live Aspects and I'll be showing you the two best ways to install VST plugins in Ableton.
- |How To Install VST Plugins
– Installation File Method
– Custom Install Method - |How To Run 32 Bit Plugins In Live 10
Without further adieu, let's get started!
| How To Install VST Plugins
Start by downloading the plugin you wish the use in Ableton. If you are not sure which plugin/s to download, browse the internet to discover an endless amount of free and paid options. If you're looking for a selection of FREE VST plug-ins for your DAW, visit here.
Below are the two best ways to install the different formats that plugins come in:
| Installation File Method (.pkg/.dmg/.exe)
This method is the quickest and most simple way to install VST plugins for use in Ableton. Plugin installation files typically have the extension .dmg or .pkg file on Mac or an .exe file on Windows. Follow these steps if the plugin you wish to install looks similar to the examples below:
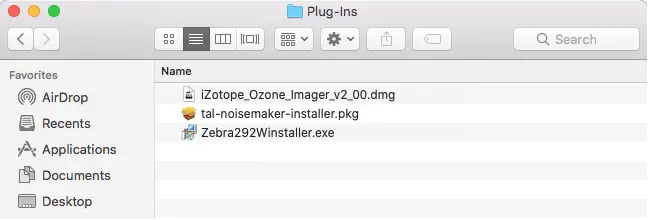
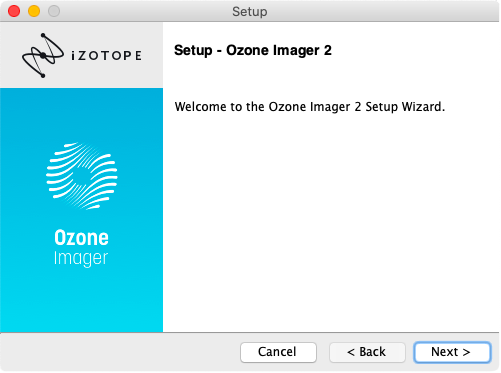
Step 1: Install Plugin
Double-click on your plugin installation file to begin the installation process. A new window will open up and take you through the steps to install the plugin. Exit this window once installation is complete. In this example, we are installing iZotope's Ozone Imager, a free stereo imaging plugin.
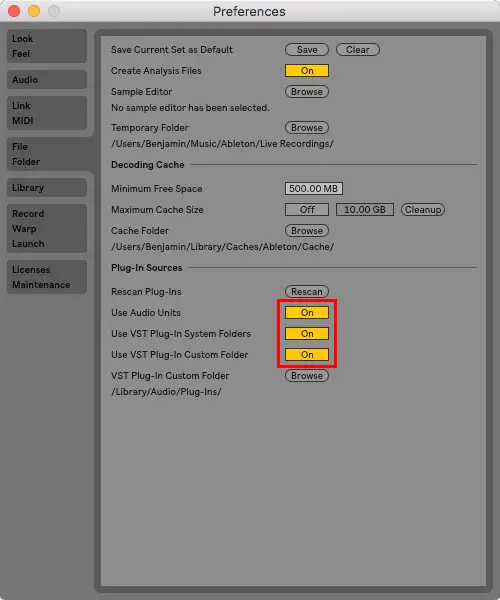
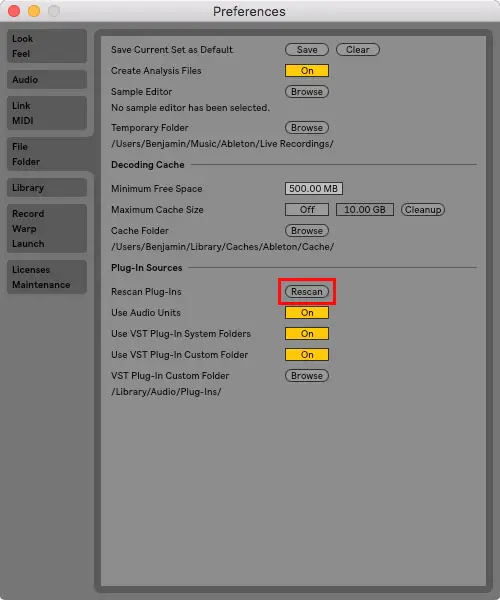
Step 2: Access Live's Preferences
Open Ableton and navigate to Live's Preferences. Next, select the 'File Folder' tab. Ensure that 'Use Audio Units', 'Use VST Plug-In System Folders' and 'Use VST Plug-In Custom Folder' are all turned on.
Step 3: Re-Scan Plugins
Firstly, ensure the VST Plug-In Custom Folder matches the location of your installed plugin. Below are the locations where plugins are installed by default on Mac and Windows devices:
Mac
/Library/Audio/Plug-Ins
Windows
C:/Program Files/VSTPlugins
If 'Not Set' is displayed under 'VST Plug-In Custom Folder', select 'Browse' and navigate to the default plugin folder for your device.
![]()
Finally, Select 'Rescan Plug-Ins'.
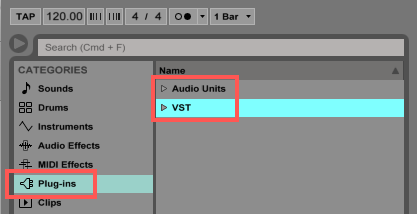
Step 4: Search Browser
Navigate to Live's Browser, select the 'Plug-ins' tab, then expand the 'Audio Units' and 'VST' drop-down menus to access a list of plugins you have installed. Alternatively, use the Search Bar to search for the name of your plugin and be sure to select 'All Results.'
| Custom Install Method (VST & AU)
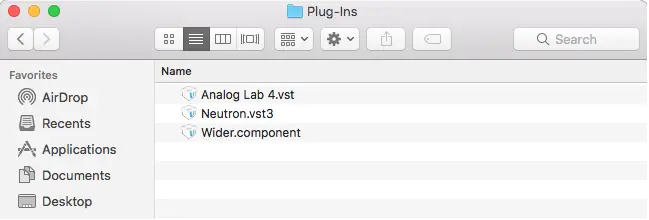
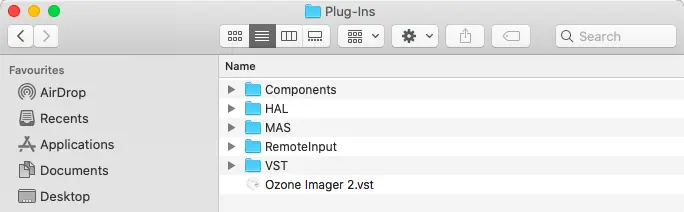
This method is the best way to install standalone VST and AU plugin files for use in Ableton. Plugins of this format typically have the extension .vst, .vst3 or .component and require manual installation. Follow these steps if the plugin you wish to install looks similar to the examples below:
Step 1: Access Live's Preferences
Open Ableton and navigate to Live's Preferences. Next, select the 'File Folder' tab. Ensure that 'Use Audio Units', 'Use VST Plug-In System Folders' and 'Use VST Plug-In Custom Folder' are all turned on.
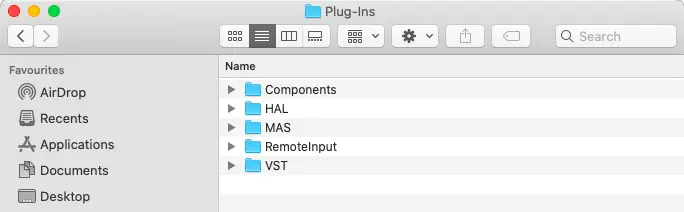
Step 2: Open VST Plug-In Custom Folder
If 'Not Set' is displayed under 'VST Plug-In Custom Folder', select 'Browse' and navigate to the default plugin folder for your device. Below are the locations where plugins are installed by default on Mac and Windows devices:
Mac
/Library/Audio/Plug-Ins
Windows
C:/Program Files/VSTPlugins
![]()
Next, open a new window in Finder (Mac) or Explorer (Windows) and navigate to the location of your VST Plug-In Custom Folder.
Step 3: Copy & Paste Plugin
Navigate to the location of your plugin and copy it by selecting it and pressing [COMMAND + C] on Mac or [CNTRL + C] on Windows. Next, head back to the location of your VST Plug-In Custom Folder and paste it by pressing [COMMAND + V] on Mac or [CNTRL + V] on Windows.
Step 4: Re-Scan Plugins
Head back into Ableton and open Live's Preferences. Select the 'File Folder' tab and press'Rescan Plug-Ins'.
Step 5: Search Browser
Navigate to Live's Browser, select the 'Plug-ins' tab, then expand the 'Audio Units' and 'VST' drop-down menus to access a list of plugins you have installed. Alternatively, use the Search Bar to search for the name of your plugin and be sure to select 'All Results.'
| How To Run 32-bit Plugins In Live 10
Ableton Live no longer supports 32-bit plug-ins and as a result, many older plug-ins have become incompatible with Live 10. While plug-in creators often provide a 64-bit solution, there is a way to use 32-bit plug-ins in the latest versions of Live.
jBridge is an application designed for bridging VST plug-ins on Mac and Windows. It makes it possible to use outdated plug-ins in any DAW. You can download this amazing software for under $20 or try out the demo version for free.
jBridge for Mac
jBridge for Windows

Want To Know More?
Here at Live Aspects, we have dozens of useful lessons and tutorials created to enhance your music production skills and help speed up the learning process. You can access our huge range of music theory lessons and production tips and tricks here.

Benjamin Jones
Hi, my name is Ben. I live in Melbourne, Australia and I'm the founder of Live Aspects. I'm a DJ and producer with a bachelor's degree in Audio Production. I've spent the last eleven or so years addicted to learning Ableton and discovering the extraordinary ways producers around the world create their music. My goal is to provide eager producers with the tools and information they need to make amazing music and experience the thrill of music production.
How To Install Plug In Ableton
Source: https://liveaspects.com/how-to-install-vst-plugins-in-ableton/
Posted by: donaldsonherry1947.blogspot.com
0 Response to "How To Install Plug In Ableton"
Post a Comment